How to Set Up a Social Media Approval Process with Your Clients

Client approval is part of the working relationship between your agency and the brand, not just a final check on a post. When expectations are unclear, your team can consider a draft finished while the client still expects another review. Feedback scattered across conversations leaves the person scheduling unsure which changes are outstanding and whether the latest version has been approved. Meanwhile, the publishing deadline approaches, and each team assumes someone else is securing the final decision. The challenge is to keep the publishing plan moving without mistaking comments for permission to publish. An unclear approval process leaves both teams relying on interpretations when they need a shared understanding of what happens next.
Setting up a social media approval process is a key part of agency-client collaboration since it establishes how content reaches an agreed sign-off before scheduling or publication. This guide breaks the setup into three steps, which involve creating shared expectations, defining the process and its rules, and putting the workflow into practice together. At each step, we will point out the important tasks to address and what you need to do to make your processes work.
The Importance of Setting Up an Approval Process With Your Clients
Setting up an approval process gives your agency and client a shared basis for deciding when content meets the brief and can move toward publication. This matters because receiving feedback does not, by itself, establish whether a draft needs further revision or has permission to go live. Agreed upon review criteria keep the discussion tied to the commissioned work, rather than leaving the agency to interpret unstated expectations. Clear responsibilities distinguish the people contributing comments from the person authorized to make the final decision.
Below, we have listed the 12 tasks that need to be considered as you implement our three-step process to set up an approval process with your clients:
- Clarify the Scope of the Project
- Set Your Project Goals
- Define Approval Requirements
- Agree on Review Criteria
- Define the Stages
- Assign Ownership for Each Stage
- Set Review Timelines
- Structure Feedback and Sign-Off
- Choose the Shared Tools
- Run a Small Trial Before You Start
- Monitor Your Performance
- Review Your Processes and Make Adjustments
Step 1: Create Shared Expectations and Define Tasks
Before defining the review process, establish what your agency will deliver and what your client expects to assess. Cover the project scope, approval requirements, review criteria, and content goals. Agree separately on content volume, quality standards, and intended audience response so delivery commitments remain distinct from desired results. These decisions give the client a clear basis for reviewing drafts without renegotiating the brief each time.
1. Clarify the Scope of the Project
Defining the project scope gives your agency and client a shared understanding of the work being delivered before you decide which tools or review stages to use. Name the channels, content formats, and deliverables covered, and identify any channel-specific versions that need to be prepared. These boundaries let both teams determine whether a piece of content falls within the agreed workflow instead of relying on different assumptions about what is included. Scope also defines the submission itself. This means you should agree as to whether the client should receive the complete caption, finished visuals, and proposed publishing date together. Making those expectations explicit lets the client assess the intended post rather than spend the review piecing together its components.
For your agency, that agreement provides a concrete preparation checklist, with a clear definition of what needs to be handed over before requesting feedback. Define each deliverable as a complete piece of work with clearly specified elements, rather than relying on a broad content category. Then agree on whether its channel-specific versions will be reviewed together or as separate submissions. This matters because grouping several versions into one review leaves room for different interpretations of which content a comment concerns. Identify each version clearly so the client can specify where their feedback applies. Also, settling these boundaries before drafting gives the agency clear instructions for making revisions and the client an equally clear basis for checking the updated work.
2. Set Your Project Goals
Project goals give your agency and client a common understanding of what the content should achieve, alongside the quality standards it must meet. Agree on the publishing frequency and intended outcome, then select the performance measures you will use to assess progress. Reach, follower growth, interaction rates, and watch time capture different aspects of performance, so the choice should follow the objective rather than treating every metric as an equivalent measure of success. Making that choice together at the start means both teams can evaluate results using the same definition of progress when the content has been published.
It’s a good idea to make publishing frequency part of the working plan, because the agreed content volume also creates a review and revision workload. Discuss that volume alongside the client’s availability and your agency’s revision responsibilities, so the publishing commitment accounts for the work both teams must complete before scheduling. Record the selected performance measures with the project goals, giving later evaluations a documented basis rather than leaving the agreed definition of progress to memory. Whenever the planned content volume changes, revisit the approval arrangement instead of assuming the existing review capacity will still fit the publishing plan.
Pro-Tip: Use a social media analytics tool to track the agreed performance measures and examine the results of published posts. A tool with post-level views and filters for content type, keywords, or individual metrics helps you connect those results to the content relevant to your project goals. Keep that evaluation separate from the publishing commitment: one concerns the audience response, while the other defines what your agency will deliver. Use the delivery agreement to define the approval stages and the performance findings to inform future briefs, rather than treating completed posts as evidence that the desired results have been achieved.

3. Define Approval Requirements
Agree which posts need individual client sign-off and which recurring content can follow guidelines approved in advance. This distinction matters because approval of those guidelines applies only to the content they cover, not automatically to every post your agency produces. Document the boundaries and how content outside them should be handled. Your team can then identify the approval route before preparing a submission, rather than discovering at scheduling that another review is required. Written requirements also give colleagues the same basis for making that decision, without relying on an informal understanding between the main agency and client contacts.
The written guidelines should let someone who was not part of the original client conversation determine whether a post needs individual approval. Define the content they cover, make their limits explicit, and state the agreed route for anything outside those limits. Keeping this information in the project instructions gives colleagues a reference they can use during preparation and review without reconstructing earlier discussions. That is what makes the documentation useful: the approval requirement follows the agreement, rather than depending on which contact is available to interpret it.
4. Agree on Review Criteria
Agree with your client on the specific conditions a post must meet to be ready for approval, so both teams work toward the same standard. Without that agreement, your agency can consider a draft complete while the client assesses it against expectations that were never made explicit. Define the checks your internal reviewers must complete before submission and the criteria the client will use when reviewing the work. Both sides then have a concrete basis for deciding whether the draft meets the brief, rather than reopening the discussion around personal preferences.
We advise that you keep the checklist specific enough to guide an actual review:
- Brand voice: the wording and tone match the agreed brand guidelines.
- Factual accuracy: statements and supporting details have been checked.
- Visuals: the creative matches the brief and the intended content format.
- Legal requirements: any applicable requirements have been addressed.
Use these criteria to make feedback actionable. A reviewer should be able to identify the part of the draft that needs attention and explain how it differs from the agreed requirement. That gives the person making revisions a defined issue to address rather than an invitation to reinterpret the whole post. It also gives the next reviewer something concrete to check when the revised version returns. Keep the criteria accessible alongside the brief, so agency and client reviewers can refer to the same standard instead of applying separate, unstated expectations to the content.

Step 2: Set Up the Approval Process and Its Rules
A useful pre-approval process for social media posts shows where a draft is, who needs to act, and what must happen before it changes hands. Define the stages and their owners, then set review timelines and rules for handling feedback, revisions, and final approval. The value is that both teams can follow the same instructions for moving work forward or returning it for changes, rather than knowing the stage names but still having to reconstruct the next action from previous conversations. Agree on how missed deadlines and unavailable reviewers will be handled, so an interruption does not leave the next step undefined.
Start with the following sequence, then define what each stage means for your agency and client:
Draft → Internal review → Client review → Revisions, if needed → Final approval → Scheduling
5. Define the Stages
Separating drafting, internal review, and client review makes clear what work has been completed before a post changes hands. Drafting produces content for assessment, while the agency’s internal review checks it against the agreed brief and criteria before submission. The client can then focus on the decisions and change requests needed from their side, rather than completing the agency’s internal checks. When revisions are requested, the updated content returns to the relevant review stage because the new version still needs to be assessed. This gives scheduling a clear boundary: completing edits or reviewing a previous draft does not, by itself, authorize the latest version to be scheduled.
Specify the material required at every handoff. This includes when a draft is ready for internal checks, the complete client submission covered by the brief, or clear instructions for the person making revisions. The next participant can then begin the agreed task with the relevant content and instructions, rather than receiving a new status without knowing what they are expected to assess or change. When revised content returns, make the current version clearly identifiable and connect it to the feedback it addresses. The practical value is a review focused on whether the requested changes have been made, instead of work spent reconstructing the revision request or determining which draft to check.
6. Assign Ownership for Each Stage
Assign responsibility for preparing drafts, coordinating internal checks, gathering client feedback, making revisions, and scheduling the approved content. Include responsibility for moving the post to the next stage, not just completing the work within the current one. On the client side, distinguish between people who contribute comments and the person authorized to give final approval. Name a backup for that approver and establish when the backup should step in. Everyone involved should know whom to contact when a decision is missing, without having to search through previous conversations for clues.
A list of review participants does not establish who coordinates the work or who can give final approval. Confirm those responsibilities with the client and keep them visible in the shared reference, so people receiving a handoff do not have to infer authority from job titles, participation, or comments. Define the backup handover just as clearly, including the conditions for using it, who contacts the backup, and the decision they are expected to make. The value is an agreed transfer of responsibility, rather than simply naming another person to contact without clarifying what they are authorized to decide.
Pro-Tip: A social media publishing tool can support project management by keeping the tasks for a post connected to its content and current review stage. Look for a setup that makes agreed responsibilities and the next required action visible, so agency and client stakeholders can identify who needs to act. This makes each handoff actionable since the next participant can find the relevant draft and understand the work expected of them, rather than reconstructing an assignment from separate conversations.
7. Set Review Timelines
Review timelines make the publishing plan actionable by specifying when each team must provide the input needed for the next stage. Set submission lead times, feedback deadlines, and time for revisions by working backward from the intended publishing date. A feedback deadline should require a complete, consolidated response, because acknowledging receipt does not tell the agency whether changes are needed or the content is approved. Specify who follows up on a missed deadline and how the outstanding decision will be handled in the publishing schedule, rather than leaving either team to assume the original plan still applies. Unless both teams have explicitly agreed otherwise, a lack of response must not be treated as permission to publish.
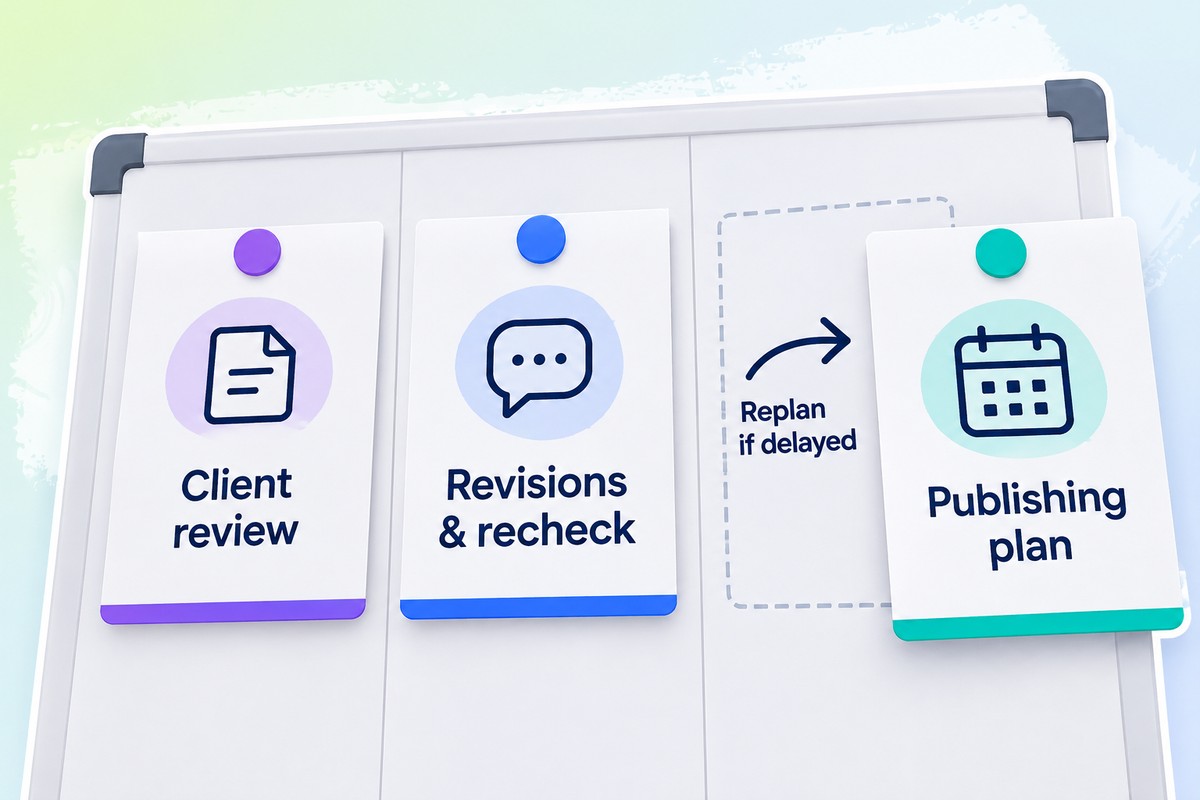
Keep the initial review window separate from the time allocated to revising and checking updated content, so both parts of the approval work fit before scheduling. Confirm that the people responsible are available within those windows, rather than building the timeline around dates they cannot act on. If a draft or feedback arrives late, apply the agreed rules to reassess the remaining steps instead of leaving every later deadline unchanged. This makes the effect of the delay explicit rather than silently reducing the time available for revisions and checking.
8. Structure Feedback and Sign-Off
Collecting client comments is not the same as giving your agency a usable revision request. Designate a contact to consolidate feedback, agree who resolves contradictions, and settle conflicting requests before passing instructions to the person editing the post. The consolidated request should distinguish confirmed changes from anything still awaiting a decision and specify which part of the draft or channel version each agreed change concerns. Keep that request with the relevant draft so the instructions remain available when the updated content is reviewed. The editor can then implement the agreed changes without choosing between client reviewers, while the reviewer can assess whether those changes were made against the same record of what was requested.
Final approval needs to authorize a specific version of the content, not merely acknowledge that feedback has been received. Keep a record of who approved what alongside that version, so the person scheduling can verify the decision without reconstructing the review conversation. Establish how later edits will be assessed, which changes require renewed sign-off, and how any new decision will be recorded with the revised content before scheduling. Agree on a decision-maker and review path for urgent posts or unavailable approvers, because an approaching deadline does not itself remove approval requirements. Recording the exception route followed and the person who authorized publication makes the decision understandable to everyone handling the post, including those who were not involved when approval was given.
Step 3: Put the Workflow in Place and Test It Together
Put the documented workflow into practice with suitable shared tools, a walkthrough of each stakeholder’s tasks, and a trial using a small batch of posts. Check whether everyone can complete their responsibilities without additional interpretation, and update the setup and instructions as the trial reveals gaps or working arrangements change. Use published results to guide future planning while continuing to review how the collaboration works.
9. Choose the Shared Tools
Assess shared planning or publishing tools against your agreed process, starting with where drafts, feedback, status updates, and approval records will live. For each participant, check how they will find the current submission, understand its status and required action, leave a response, and make the resulting decision available to the next owner. Keep the connection between the draft, its comments, and its sign-off clear so reviewers and the scheduler can identify exactly which content a decision concerns. If creation happens elsewhere, agree on how the draft enters the shared workspace, which version becomes authoritative, and how it is distinguished from earlier drafts before approved content moves into scheduling. The value is a setup that supports the actual handoffs, rather than a collection of convenient features or an assumption that shared access means everyone is reviewing the same version.
Walk agency and client stakeholders through the actual review route, including the backup before they need to provide cover. Have each participant perform their role’s tasks, from opening drafts, requesting changes, and finding consolidated feedback to recording approval or locating the approved version for scheduling, rather than presenting every available feature. Doing the tasks reveals whether people have the necessary access and can follow the written instructions, which choosing a workspace alone does not establish. Add any explanations they need to the shared reference instead of leaving that knowledge only with the people who attended. This makes the preparation useful beyond the walkthrough, because a backup or another stakeholder can follow the documented process when taking over.
Pro-Tip: Choose a social media tool with capacity for your agency’s full client portfolio, which may mean managing dozens or even hundreds of social media profiles. Assessing that total upfront helps you select a setup that accommodates the work across clients, rather than discovering a profile limit after building your workflow. Tools with unlimited profile management are available, removing the profile-count ceiling as you add client accounts.
10. Test Your Approval Flows
We recommend testing the approval workflow with a small batch of posts before applying it more broadly. Take the content through the agreed stages rather than treating successful access to the workspace as proof that the process works. Focus on the handoffs between agency and client, checking whether each person understands when their responsibility begins, what they need to receive, and how to move the post forward. This makes the trial a practical check of the instructions people will follow, using the following questions to identify anything that still needs clarification:
- Does each participant know when action is required and what they own?
- Does client feedback reach the person responsible for revisions in a usable form?
- Do revised drafts return to the appropriate reviewer?
- Can the scheduler identify the exact version that received approval?
- Are the instructions clear when a handoff cannot happen as planned?
Ask the people who performed the work, rather than relying only on the process designers, where the instructions needed explanation and what information or decision was missing at the stage where an issue arose. Their answers provide a concrete basis for deciding whether to change responsibilities, review timelines, workspace arrangements, or written guidance, with the findings and resulting changes recorded together. Before applying the setup to more content, confirm that both teams understand the updated instructions and know when a post must return for review instead of moving into scheduling, so the trial ends with a usable process rather than an unresolved list of problems.
11. Monitor Your Performance
Use the agreed project goals to decide which results to examine after publishing, then review those results alongside the client’s actual posts. This turns the performance discussion into an assessment of the published work against its intended purpose, giving both teams a concrete basis for evaluation rather than a report whose figures are disconnected from the content. Finish by deciding how the findings should inform future content and the next brief, so the analysis becomes part of planning instead of ending with the report.
To monitor performance, it is generally a good idea to use a social media analytics tool to examine your client’s past performance and benchmark it against competitors, giving the results context rather than assessing them in isolation. Also, record which posts received saves or shares, which formats were associated with stronger reach, and the topics they covered to investigate why some posts perform well while others miss the intended audience response. Discuss those patterns with your client to decide what to retain or change in the next creation cycle, turning the findings into direction for content optimization and future briefs. Keep this analysis separate from sign-off, which checks the current draft against its agreed requirements.

12. Review Your Processes and Make Adjustments
Leave room for feedback on the approval workflow after implementation, not just comments on the posts moving through it. Agency and client stakeholders need a clear way to raise practical problems they encounter, such as unclear responsibilities or instructions that are difficult to apply. This makes the people doing the work part of improving the process, so decisions about adjustments draw on their experience rather than assumptions about how the setup is functioning.
Collecting feedback is only the starting point; make time with your client to assess what it means for the approval workflow. Use that discussion to identify which concerns require a process adjustment and what should be done differently, rather than making changes without a clear purpose. Where an adjustment is needed, agree on it together and explain it to the people who will follow it. The value is a shared decision that turns practical feedback into a clear working arrangement, instead of leaving each person to interpret the feedback for themselves.
Conclusion: How to Set Up a Social Media Approval Process with Your Clients
Setting up client approval means turning the project brief into a working agreement that carries through to publishing. Scope, review criteria, and goals establish the basis for assessing content before individual drafts enter review. Assigned responsibilities, review deadlines, and consolidated feedback then give each submission a defined route to version-specific sign-off. Once posts are published, use their performance to inform the next brief and connect the approval workflow to ongoing content planning.
A shared social media tool is useful when it helps both teams work from the same content and decisions, not merely access the same software. Bringing responsibilities, client comments, and the posting schedule together makes it clear how feedback relates to the work being prepared and what needs to happen next. Reviewers should be able to find the current draft and understand the action expected of them, while the person scheduling needs to identify exactly what was approved. With those connections in place, the workspace becomes a practical reference for following your agreed process rather than another location for disconnected messages.
If you are looking for a social media tool to support this work and that offers unlimited profile management, then start using Fanpage Karma for free today. You can also sign up for a free webinar.